Investment Casting
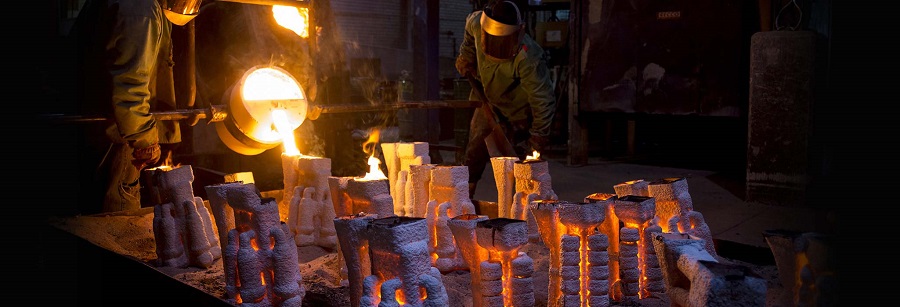
Investment casting, also known as lost wax casting, is a manufacturing process in which a wax pattern is created and then coated with a ceramic slurry to create a mold. The wax is then melted out of the ceramic mold and molten metal is poured into the cavity. The molten metal solidifies and the ceramic shell is then broken or blasted off, creating a metal casting. The investment casting process does not require a minimum order quantity and can cast parts ranging from a few grams to upwards of hundreds Kgs, so it can be a manufacturing solution no matter what size project you are working on. Precision investment casting is capable of producing precision components, the tolerance control is better than most of other casting processes, as well as surface finish.
Learn more about our precision investment casting process here.

Benefits of Investment Casting
The advantages of investment casting are impressive. Create almost any configuration of your precision metal component. Design parts as small, large, or complex as you need. In short, eliminate many of the barriers holding you back today. Investment casting can also help you:
a. Reduce secondary operations
b. Create stronger parts
c. Have the widest choice of alloys
d. Produce less waste
e. Maintain incredibly tight tolerances
f. Incorporate thinner walls for reduced weight
g. Maintain outstanding repeatability
h. Reduce tooling costs over multiple production runs
i. Design highly detailed surfaces and stamps
Learn more about advantages of investment casting here.
Tolerance Capabilities
–Geometric Tolerances
The investment casting process can produce precisely replicated parts in a truly economical fashion. Effective part configuration is the critical element in achieving strict tolerances for investment casting. Milwaukee Precision’s team of experts communicates with you at every step of the process – ensuring you of a quality experience that is unparalleled in the investment casting industry.
Straightness, Roundness, & Positioning (holes or bosses)
The standard tolerance is ±.005 per inch for axial straightness, roundness (bar or tube shapes) and positioning of holes or bosses.
Concentricity
The concentricity is dependent on measurements taken from the same plane, and does not include out-of-roundness tolerance. If this is the case, the center of a bore to the outside diameter of a part will be concentric within .003″ for each 1/2″ of wall thickness.
Angularity
The as-cast angle tolerance is a function of the part design. A minimum tolerance of ±1/2 degree is considered standard.
Blind Holes and Slots
Blind holes and slots can be cast, assuming that the depth is equal to the width or diameter for small characteristics less than 3/8″. When depth sizes increase above 3/8″, the size of the opening will be incrementally doubled.
Flatness
Flatness is measured as the distance between two parallel planes, within which the entire surface of the part must lie. The shape of the part will influence the cooling behavior of the wax pattern and the part as it solidifies. This tends to determine the process capability, which is frequently expressed in terms of six square inches of surface area. The chart below shows general flatness guidelines based on part thickness.
Wall Thickness
The standard minimum wall thickness for investment casting lies between .040″ and .080″. Wall thickness as low as 0.020″ has been achieved within a small area. Overall wall thickness is dependent on the alloy used and the size of the surface area.
–Linear Tolerance
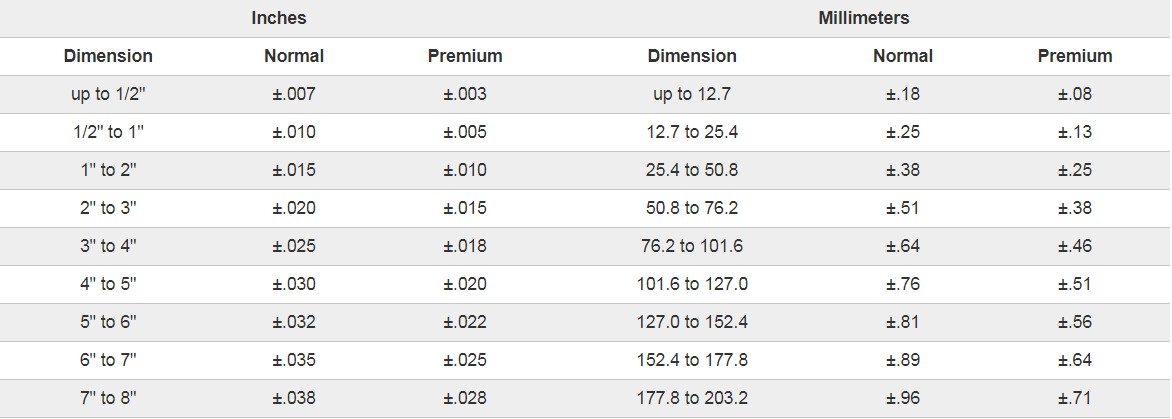
The investment casting process can produce precisely replicated parts in a truly economical fashion. Effective part configuration is the critical element in achieving strict tolerances for investment casting. Ego Manufacturing Group’s team of experts communicates with you at every step of the process – ensuring you of a quality experience that is unparalleled in the investment casting industry.
General parameters for linear investment casting tolerances are shown below:

